GUIDE WILL BE UPDATED SOON.

Tiny Tina's Wonderlands - Crackmast Cove Lucky Dice Locations

Guide Last Updated:
6/29/2024

In Tiny Tina's Wonderlands you need to find lucky dice on each of the maps to increase your luck stat for many reasons including getting 3000 luck for the Luck Amok achievement. So in this guide we'll be going over all of the locations of these dice on the Crackmast Cove map.

Lucky Die 1

To begin your adventure in Crackmast Cove, head straight to the Salty Saunter. Follow the path leading to the waterfalls. The first die you’re looking for is perched on a ledge. To reach it, jump onto a nearby wooden peg, then onto the beam, and from there, leap across to the ledge where the die awaits.

Lucky Die 2

In the Swarthy Cannonade area, head left toward the house by the beach. The second die is located near the door.

Lucky Die 3

From the Swarthy Cannonade, head west towards the Coiled Hollow area. The third die is nestled among the plants there.

Lucky Die 4

In the Coiled Hollow, continue west and head right of the whale carcass. Pass the house on your right and you will find the fourth die in a small alcove.

Lucky Die 5

In Coiled Hollow, locate the tunnel near a house and follow the path. Ascend the sets of stairs and turn right to find the fifth die under an awning.

Lucky Die 6

From the Coiled Hollow, head south through the tunnel near the whale. Look to your right to see a house; the sixth die is located on the roof.

Lucky Die 7

Head east from Bonethrow Bay to reach Auntie Anchor's Shark Shack. Continue towards the shipwreck with white sails; the seventh die is located in the hull.

Lucky Die 8

Return to Auntie Anchor's Shark Shack and look for the huts along the beach. Find the small hut with a palm tree beside it. The eighth die is located on the roof of the awning attached to this hut.

Lucky Die 9

Start at The Salty Saunter and run east along the main path. Veer slightly right to pass through a hole in the fence, then turn right. Proceed onto the bridge and jump off onto a wooden pier. You'll find the ninth die at the end of the pier.

Lucky Die 10

Head to Scallywag Landing and go west through Wreckers Bane, then enter the cavern on your right. This route will take you to Phil's Digs. Follow the path leading out to a cannon where you will find the tenth die sitting nearby.

Lucky Die 11

At Scallywag Landing, head east and cross the wooden bridges. Look for a house where you will need to jump onto poles to climb up. The eleventh die is located next to the building.

Lucky Die 12

From the previous location, jump back down towards Scallywag Landing and head in the opposite direction to find the twelfth die next to a tent.

Lucky Die 13

From Scallywag Landing, pass the vending machines and head right. Follow the path until you come across stairs leading up. These will take you to an awning, underneath which you'll find the thirteenth die.

Lucky Die 14

In Scallywag Landing, starting from the vending machines, head left. There's a seafoam green building around which you can navigate to find a little alleyway next to it. The fourteenth die is located there.

Lucky Die 15

From the location of the fourteenth die, head northeast to a small building on the left. You will find the fifteenth die sitting on the balcony.

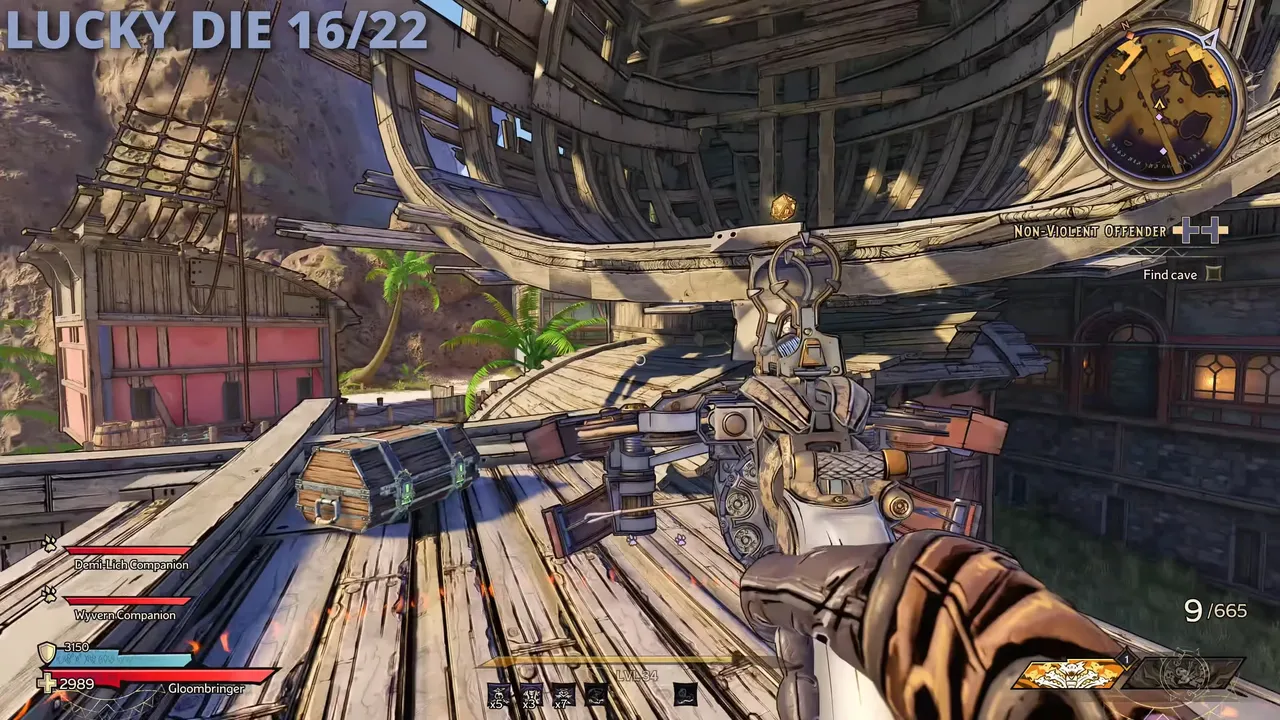
Lucky Die 16

Starting at Supreme Port, pass through the area and navigate around a large overturned ship. Head right and proceed through the fence. Continue towards a large structure with a tattered white sail at the top. Cross a large wooden bridge and then jump onto a ladder on a light blue building to your right. Climb to the top, where you will find the sixteenth die sitting in a ship hull.

Lucky Die 17

From the location of the sixteenth die, jump off and cross back over the bridge. Once on the other side, take a left and proceed to a wooden area in the corner where you'll find the seventeenth die.

Lucky Die 18

Travel back to Supreme Port and head through the overturned ship. The eighteenth die will be directly ahead and to the left.

Lucky Die 19

From the location of the eighteenth die, head around to the other side and go through the hole in the fence. Then, turn left and drop down to the platforms on the side of the mountain to reach the nineteenth die.

Lucky Die 20

After entering the Jaggs and melting the grate, drop down and you will find the twentieth die to your left, situated under the bridge.

Lucky Die 21

From the location of the twentieth die, head up to the right and cross the bridge. Pass through an archway leading to a house, climb up, then turn to the right. You will find the twenty-first die on the platform above you.

Lucky Die 22

Once you pass through the second gate in Scallywags Landing, enter the new area and notice the die behind a storm grate. Go upstairs and to the left to reach a ladder that allows you to descend into the storm grate area. Follow the tunnel to the end, where you'll find the twenty-second die.


If you found the video guides helpful be sure to also like, comment, and subscribe over on my YouTube Channel.

I also cover the achievement/trophy guides for many other games so whether it's on Youtube, our website, or Steam check out some of my other guides to help you 100% more games.

Thanks for reading/watching!